Tags are segments of code provided by analytics, marketing and support vendors to help you integrate their products into your websites or mobile apps. With Google Tag Manager, you no longer need to add these tags directly to your projects. Instead, you configure and publish tags and how they fire from within the Tag Manager user interface (Source: Support.google).
You can create an unlimited configuration of tags in GTM which will help assess in-depth reports on your audience behaviour on site, but you should also be mindful of the number of tags created to help organize tracking and organization of tags. For example: having naming conventions in place will help determine which tag was used for a particular action on the website.
List of supported tags can be found HERE
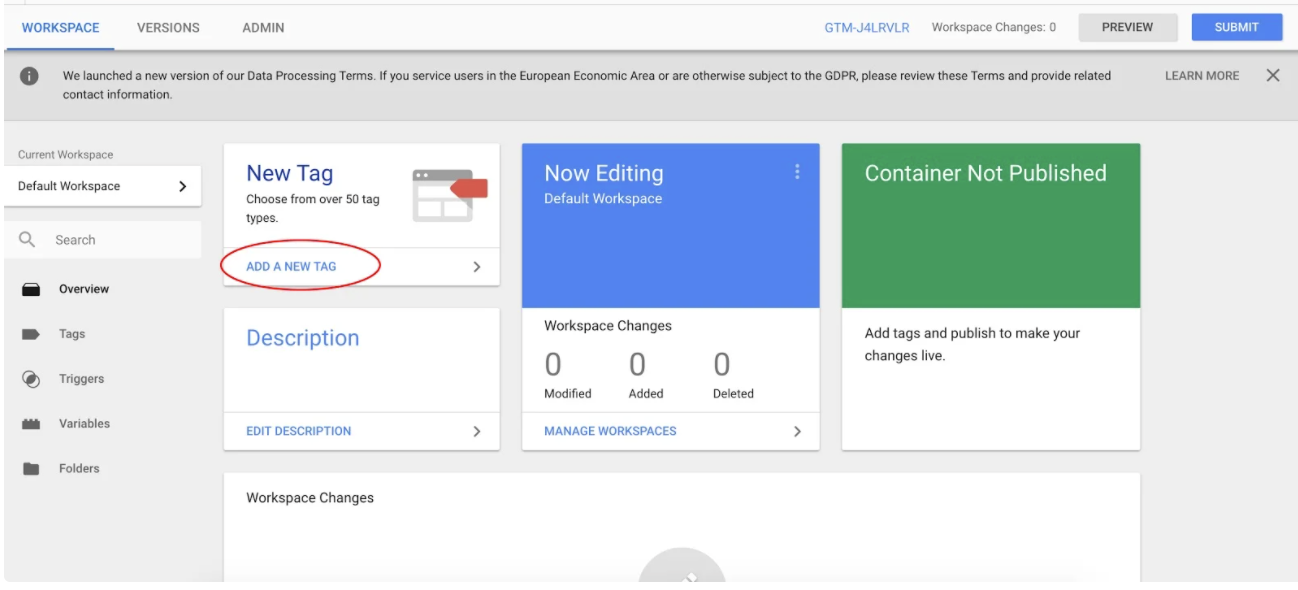
To set up a basic tag which uses the GTM integration to track page views and trigger the according events in a Universal Analytics property within Google Analytics, follow the steps below.
Creating a Universal Analytics Tag

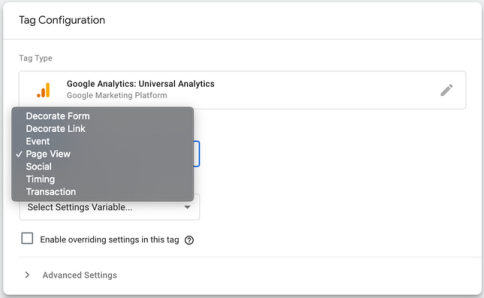
4. Next you will see the option to input the ‘Type of Tracking’- we can start with ‘Page View’
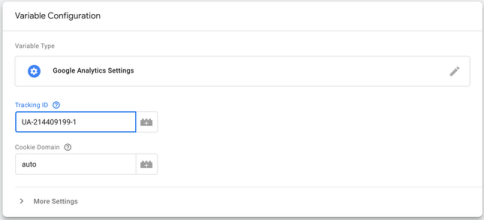
5. In the next step, click on Google Analytics Settings dropdown and choose New Variable…


8. We are now done with the ‘Tag Configuration’ setup. We now need to scroll to the ‘Triggering’ section and choose ‘All Pages’ as a trigger (as shown below in the screenshot)


10. The new loaded page will give you another prompt to ‘Publish’ with a preview of all the information, click on Publish

11. Congratulations! You have now created a new container version with Tracking ID from Google Analytics.

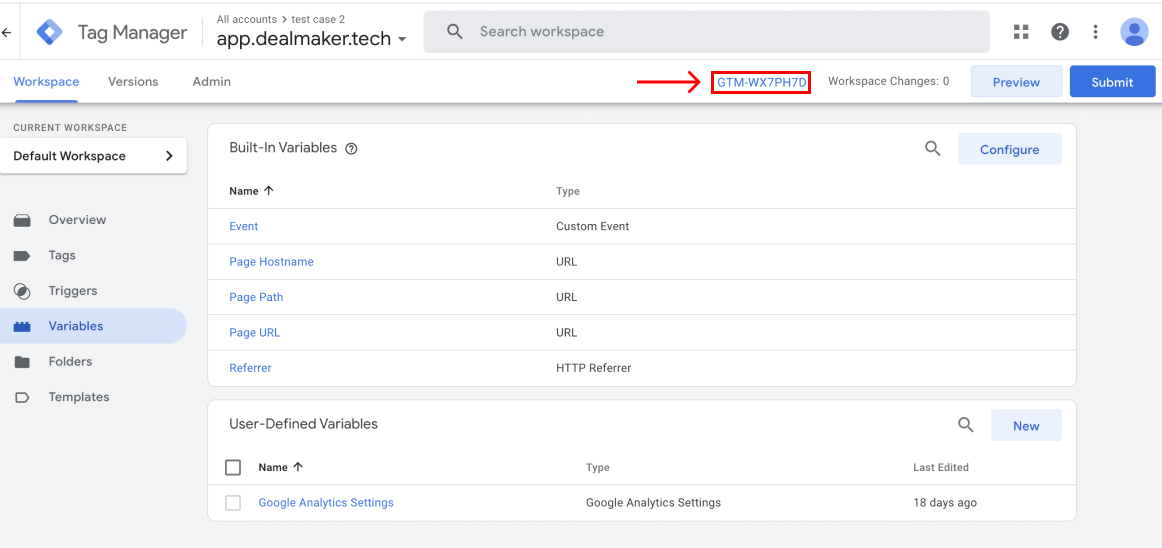
You’re now able to use your Google Tag Manager in conjunction with Universal Analytics on Google Analytics. You will need to provide your GTM account ID to your DealMaker customer success representative if you have not done so already. To access the information, go into your ‘Workspace’ Tab in your Google Tag Manager dashboard, on the top right you will see the GTM tag ID which starts with GTM- (xyz) as seen in the screenshot below.
Note: You might see another tag while setting up which is internal to DealMaker. This will only happen if you use a setup assistant or a debugger. Your tags will not be affected by this as each page can have multiple tags without issues.